Static Websites in Azure Blob Storage... Why it's Cool.
October 6, 2018
Did you know you can host static webpages in Azure blob storage? This feature has been in public preview since June, and I’m a big fan! I’ll explain a few reasons why I think it’s cool, and then give you step by step directions on how you can leverage this yourself for your own projects.
There are tons of other hosts out there.
- There are tons of hosting options for static websites, some of them are even free. (Azure is not free, but it’s close). Take a look at their calculator to see how much it will cost you. At the time of writing this, the estimated cost for a static site hosted in blob storage with up to 100k requests per month is less than $0.10 per month.
- You can get instant geo redundancy, with no extra effort. You just have to select the redundancy model that fits your needs. This is crazy to think about. No more worrying about disaster recovery yourself. For small websites especially, this is an incredibly easy and cheap way to get resiliency.
- Easy deployments. You can deploy from the command line, or upload through the portal. There are easy ways to get the files where you need them to be, whether you’re a beginner, or an expert. (I’ll be posting soon about how to deploy an Angular app here with Travis CI).
- Solid scalability. Unless your site is ridiculously popular, this will be able to handle the traffic you get. You can read the details of that here.
Now for the fun part. Tutorial below!
Prerequisites (follow the links if you need help)
- An Azure account. (You can get a free trial if you don’t already have one). You can optionally install and login to the Azure command line interface (CLI). I won’t reference it much in this tutorial, but I’ll use it in the next one. Everything I’m doing here can be done from the command line as well.
- A text editor. It doesn’t matter which one, but I personally like Visual Studio Code.
Got that done? Okay, let’s do this!
- Create an index.html file - you can put whatever you want in here. I opened a text editor and saved a new file called index.html, that looks like this:
- Navigate to Azure portal Storage Accounts Page - When you login to the portal, navigate to the “Storage Accounts” page. There are multiple ways to get there, you can type it into the search bar, or find in the left navigation pane.
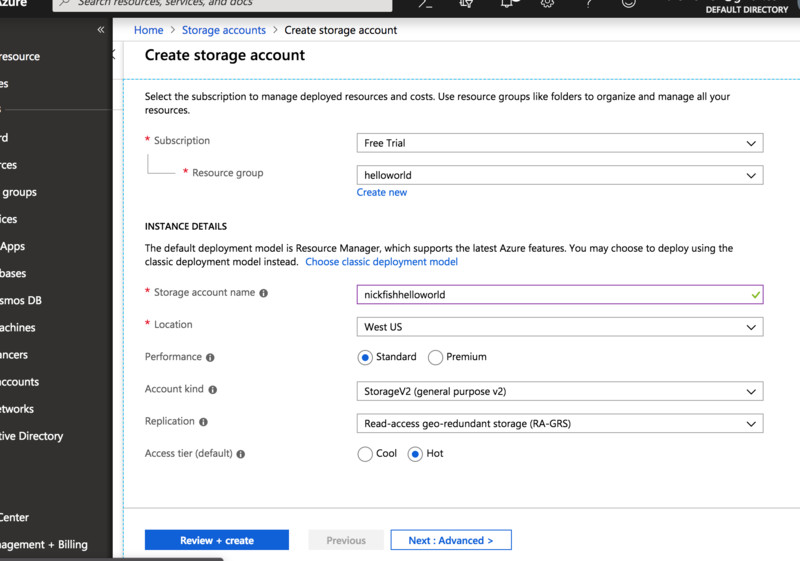
- Create a storage account - Click on the “+ Add” button to get started creating the new account. There are lots of options here, but we’ll keep most of the defaults. You can choose a region that’s close to where you live, create a new resource group, and give the account a name, and then click the “Review + Create” button, if everything passes, click “Create.” here’s an what mine looks like:

- Navigate to the new account - Wait a little while, and it should tell you that “Your Deployment is Complete.” From here, you can click the “Go to Resource” button. No worries if you navigated away, you can just find your storage account within the portal one of the other ways, like the “Storage Accounts” item in the left nav pane.
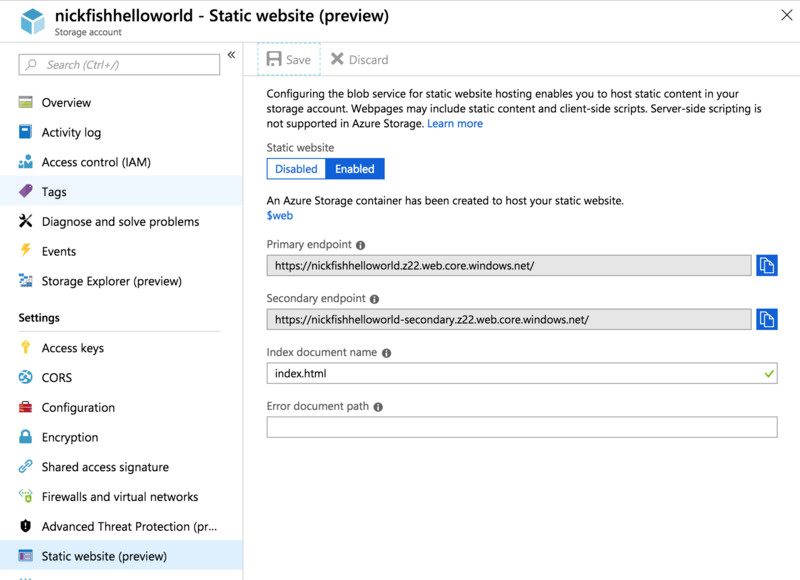
- Enable static website hosting - Under the settings for your storage account, navigate to the option that says “Static website (preview)” and it will take you to a configuration screen. On this page you’ll want to change the toggle to “Enabled” and then in the “Index document name” just put “index.html” and leave the “Error document path” blank for now.
Here’s an example:

- Take note of your website URL - Once you’ve saved the details in the static website configuration page, you’ll see an item called “Primary endpoint” with a URL. This will be the URL we will use to access our website! You can copy it, and open it in a new tab, and you should see an error page. This is expected, because we haven’t added our webpage yet!
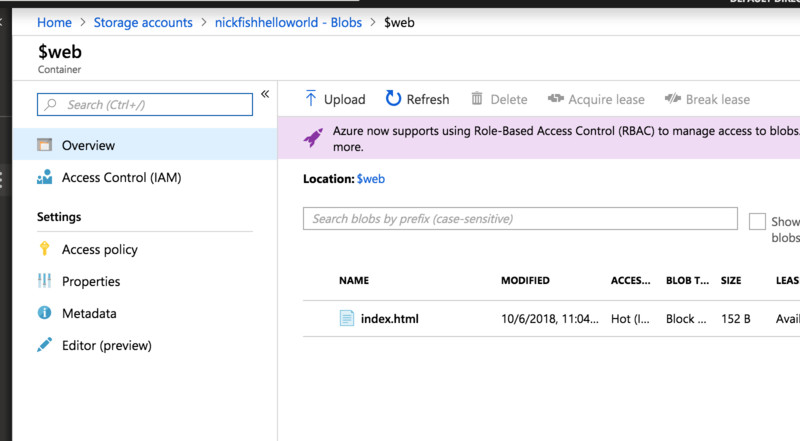
- Upload your index.html file to Azure - In your storage account, go to Blob Service -> Blobs. You will see a container in the list called “$web” that you can click to open. Once inside the $web container’s page, there is an “Upload” button. Click it, and choose the index.html file you created in the first step.
Once you’ve uploaded that file, it should look like this:

- Navigate to website - We should be up and running now! Our site is hosted in Azure. If you navigate to the URL from step 6, you should see the index.html file you created up and running on the internet in all its glory!
Conclusion
Now you can go experiment with other things! This is the basics of getting a site up and running. Soon I’ll show a more comprehensive example of some continuous deployment from Travis CI, and even hosting a more realistic application in Blob storage. This is an amazing and very affordable option to get your website out there. Let me know what you think!